A Freelancer's Life

I recently read an article that stated that more people are going from adding on side gigs (in addition to their full time 9 to 5 jobs) to now relying completely on freelance jobs. There are SO many articles already out there about the top money making freelancing jobs, so I’ve decided to include the smaller ones. The ones for newbies who want to start out small and test the waters to see if they are ready to leave their full time jobs or perhaps want to save up more for a vacation, pay off some extra bills, or fill in some extra time.

Each platform featured has been independently selected and reviewed by myself. If you click the links included, I may earn a commission.

Each platform featured has been independently selected and reviewed by myself. If you click the links included, I may earn a commission.

There are SO many freelance jobs you can start right NOW to begin making money- all you need to get started is your mobile device.

I personally really enjoy freelancing for a number of reasons:

  • be my own boss= Stress free work environment

  • make my own hours

  • set my own hourly rate

  • meet some amazingly cool clients and companies

Here are some platforms that I’ve enjoyed doing in between my acting and modeling jobs.

Instacart: If you have a car, drivers license, and a cell phone than you can shop and deliver people’s groceries. This is a good job for people who don't especially like siting at a desk all day. You’ll definitely get your steps in for the day doing this job. The app will send you a shopping list, you scan each item on the list using the app, check out using the company credit card they give you, and then deliver the groceries to the clients door. You'll also discover new foods and get some great meal inspiration while your at it! Click this link to get started.

Instacart-Personal_Shopper-Bag-freelancer

Rover: Are you an animal lover? Walk dogs or cat sit with this app. Simply download the app and fill out the profile to get started immediately. The company does complete a background check for this application. Make sure to fill out your profile, so that prospective clients can get a sense of who you are. I also recommend putting up a couple pictures of yourself interacting with animals.

This has recently become one of my favorite side hustles because I love meeting new little critters in my neighborhood. Plus it's a great way to get in extra exercise!

TaskRabbit: I’ve been doing TaskRabbit jobs since 2014 and it’s by far one of my favorites. You can set your hourly rate and daily schedule. It’s nationwide, so you can even complete some tasks regardless of your area code and even for some extra cash while your on vacation! lol.

Help someone with their daily chores and make money while doing so. Select the task(s) that best suit your skills. These span from: virtual assistant, moving help, house cleaning, delivery driving, website building, elderly and pet care, and the list goes on.

Download the app, complete your profile, and set your own prices to get started. Also let me know if/when you join, so that I can give you more insider tips!

Taskrabbit-chores-setyourownprice

Postmates: want to get to know your neighborhood while making some extra cash? Download the App to do these fool proof food deliveries from local restaurants to your neighbors. You can even do deliveries on foot or bike if you don’t have a car.

everything-you-need-to-know-about-postmates.png

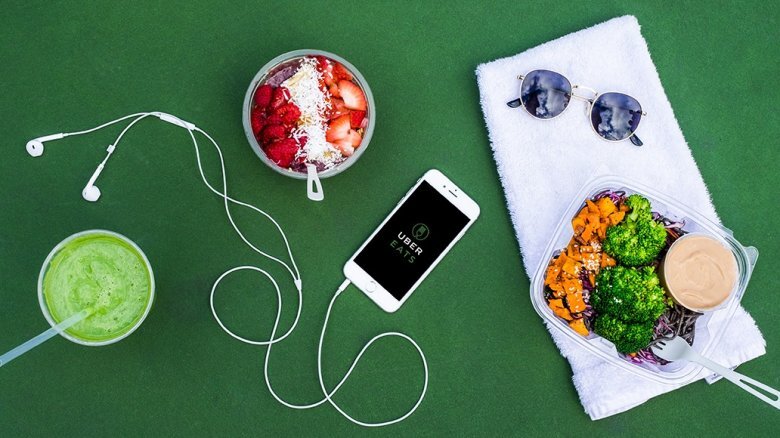
Uber and/or Ubereats: Whether you elect to drive people for to their destinations or just do food deliveries, this app can easily make you $100 a day. You will need a valid driver's license and proof of insurance for this job. Here’s the link to register.

uber-app-eats-freelance

Cashapp: You can make residual income each day by referring your friends to the Cash app. Click this link to follow the step-by-step directions and download the cashapp.

cashapp-freelancerslife-savemoney

Let me know which company best suits you. Cheers to you making more money in 2020!


Xoxo,

Mari


10 Best Indoor Plants That Improve Air Quality and Won't Upset Your Allergies

Plants are amazing for so many wonderful reasons! They not only make great statement pieces for your home décor, but they also can improve your health! Yup, that’s right— they can help purify the air in your living space, office cubicle, and/or classroom.

Disclaimer – this post contains affiliate links to the products that I use and trust. This means I may receive a small commission (at no extra cost to you) if you make a purchase using any of my links below. Thank you for the support!

Disclaimer – this post contains affiliate links to the products that I use and trust. This means I may receive a small commission (at no extra cost to you) if you make a purchase using any of my links below. Thank you for the support!

The good thing about them is that they come in all shapes, and sizes, so they can fit just about anywhere. AND studies have shown that interacting with indoor plants can reduce your physiological and psychological stress!

Plants are truely magical! @inanothergreenworld took a three day time lapse of several varieties of calatheas, marantas, Ctenanthe, and an Oxalis dancing with the light.

As our climate control issues continue to be on the forefront of the media and rates in asthma continue to increase, you can do your part by owning some indoor plants (and if your feeling ambitious planting a tree) My partner and I initially bought plants as a means to help furnish our apartment but now we’ve come to think of them as our roommates too (just joking only slightly!) Sam has asthma, so along with our aromatherapy essential oils diffuser, we have plants now in every single one of our rooms (yes even the kitchen) to help keep the air in our apartment smelling fresh and purified.

All included here except for the Chrysanthemums.

All included here except for the Chrysanthemums.

In all honesty many people just aren’t plant experts, trust me I can tell you personally that it’s taken me years to join the green thumb club and I still make mistakes with their health from time to time. That’s why I created this list of the top ten best indoor plants that improve air quality by reducing and filtering everyday pollutants.

*Allergy sufferers: if one of your concerns is pollen from plants- not to worry as the plants I mention below won’t effect your allergies. If you are an allergy sufferer, I recommend throwing out all carpets, changing out your air filters (especially in your HVAC system), and buy some plants!

Indoor Plants Are GREAT Because They

  • remove chemical toxins from the air (smoke, formaldehyde, xylene, trichloroethylene)

  • catch and digest mold spores and dust mites

  • naturally humidify the air

  • beautify the home

  • limit stress

healthline foolproof plants anyone can grow indoors

Can remove formaldehyde, xylene, carbon monoxide, and toluene from the air.

It can also humidify a room in dry winters or summers because it actively transpires (sweats or releases) moisture from its leaves. An adult palm can transpire up to 1 liter of water per day which keeps air fresh, moist, and makes it easier to breathe. For people with asthma, moist air is helpful.

Outdoor winter temperatures will kill this plant so make sure to keep it indoors!

These plants can grow up to 7 feet tall so be prepared to re-pot the plant and give it multiple trims (kind of like human hair! lol)

Peace Lilies

NASA conducted some research and found that this plant can help improve air quality by 60%. It neutralizes benzene, formaldehyde, and carbon monoxide.

In addition, it can help reduce mold in the home. How exactly you might ask!?! The plant absorbs mold spores and converts them into food (amazing right?).

It’s not only a beautiful plant but it looks great in just about any room you display it in. It’s perfect because it prefers indirect sunlight.

Spider Plant

This plant is easy to maintain and tough to kill so you don’t need a green thumb to own one of these.

This plant has long, thin leaves so if you’re up for hanging a basket from the ceiling, they also look great in the bathroom.

Oh, and they also do a fabulous job cleaning the air- especially of formaldehyde!

Golden Pothos

Golden pathos grows long vines like ivy!

Golden pathos grows long vines like ivy!

Easy to care for as you only need to water every 10 days.

They also clean the air by taking in the good and releasing the bad.

Their nickname is, Devil's ivy.

They thrive in medium to low light and grow like- well ivy!

Easy to propogate- meaning to cut clippings from and give to friends to grow. To do this, simply cut off a piece of the stem anywhere from 6” to 12" and place in water. That's it!

Dracaena Plant

Low maintenance plants- great for beginners!

It’s specialty is removing benzene from cigarette smoke and other household chemicals but it also removes formaldehyde, xylene, trichloroethylene.

Barely needs to be watered, compared to other plants on this list

Does well in low light- so it’s great for bedrooms (especially if you have black out curtains)

Boston Fern

Great for bedroom- very pretty plant, especially when it’s hanging!

Loves sunlight

Requires occasional misting of the leaves. I use a spray bottle for misting!

Snake Plant

Low maintenance plants- great for beginners!

Barely needs to be watered, compared to other plants on this list

Does well in low light- so it’s great for bedrooms (especially if you have black out curtains)

I recommend buying a small one, as they do grown rapidly and tall (it’s been fun for us to measure the growth of our plants- yes we are nerdy! This is also a fun science lesson to do at home with your kids.)

Aloe Plant

Not only is this plant great for curing cuts and sunburns (and makes a very hydrating face mask) but it’s also great plant for the bedroom!

Aloe plants are part of the succulent family. Succulents are very easy to care for because they require little light and water. (Great starter plant for children to learn to care for too!)

Succulents start off very small and grow slowly so it’s very easy to have a couple located around your home.

I would recommend air plants for your bathroom as they don’t require soil and can grow from anywhere. Many people hang them from string, wire, or place them in glass bulbs.

They are perfect for the bathroom because they absorb the humidity caused by showers. Because of this they do not need to be watered!

Thyme & Parsley

Parsley

Parsley

If you are looking to grow your own herbs for cooking and to help purify your indoor air space, then growing these two herbs is right up your alley!

You can start growing them in super small pots, so they literally take up little space!

Plants to Avoid If You Have Allergies

  • Any type of bouqet that contains an assortment of flowers is bound to have at least one that contains pollen or is a relative to ragweed.

  • Sunflowers- Many people love these but if you have an allergy to ragweed than these will give you a reaction.

  • Daisies- These are lovely as well but have a high pollen count which can blow around your living space.

  • Chrysanthemums- Very attractive to the eye but are sadly related to ragweed.

  • Fig tree- The wax produced from this tree can attract dust, and can also mimic a latex allergic reaction.

  • Pine trees- The only time I think people have pine in their houses are during the holidays, but pine trees can cause allergic symptoms as their needles easily collect dust and mold.

  • Bonsai trees- Can cause allergies if you have a cedar allergy so buy one that is not a juniper.

  • African Violets- Their fuzzy leaves collect dust mites.

A Couple Notes

  • Make sure you wipe down your plants leaves using a damp cloth to ensure that dust particles aren’t collecting on the surface. This goes for everyone, not just those in the houses of allergy sufferers.

  • Mold likes to grow in warm, moist areas- so make sure you are not overwatering your plants (especially in the warm summer months). Even if the top of the soil looks dry, the rest of the soil might still be moist enough from the previous watering sesh. To check if it is indeed time to water your plant, stick your finger down into soil about one inch. If it comes back with wet soil on it then you know the plant doesn’t need food just yet.

  • I personally like to tag each plant with a label so that both of us (and anyone visiting or caring for the plants while we are away) can remember the species of plant we own (because yeah sometimes we forget the exact name) This was especially helpful when we were first starting out as plant parents because we were able to look up online the specific care each plant required.

Your turn now—-> Share with me some of your favorite house plants and why!

xoxo,

Mari

Cool Mud/Wtr Health Benefits

Have you ever been so dependent upon caffeine that if you didn't have it every morning you would get a severe headache or even throw up?

Have you ever been so affected by caffeine that not only does your heart race but you start to sweat profusely if you aren't doing some type of heavy cardio?

Are you just not a big caffeine person altogether, but want a natural source of energy to help you every morning?

Then this drink is for you!

Disclaimer – this post contains affiliate links to the products that I use and trust. This means I may receive a small commission (at no extra cost to you) if you make a purchase using any of my links below. Thank you for the support!

Disclaimer – this post contains affiliate links to the products that I use and trust. This means I may receive a small commission (at no extra cost to you) if you make a purchase using any of my links below. Thank you for the support!

Allow Me To Introduce: MudWtr

MudWtr is a natural source of energy for your body, mind, and soul. Every cup is bursting with a delicate mixture of sweet, a hint of spice, and only has 1/7th the caffeine of coffee. I especially love it because it draws it’s natural energy sources from a complex blend of mushrooms. The mushrooms are not only cancer fighters, but give you that same jolt of energy that coffee does!

My honest opinion: Because of all the ingredients, I don't equate MudWtr to having a cup of coffee. For me, it’s more so similar to a cup of really flavorful hot chocolate that gives energy.

Talk about a true Ayurveda beverage! I love the sweet taste from the cacao, and the cinnamon works hand-in-hand with the Masala Chai to bring out a hint of spice. Plus, The warm, bitter, earthiness of the turmeric adds hints of citrus and ginger. It’s a perfect blend of all the ingredients without overwhelming your taste buds. AND-- it's all natural, good for you!

My mother used to be so addicted to caffeine and would have terrible bouts of withdrawal headaches and nausea. She wanted a healthier alternative to coffee. After doing some research, she discovered MudWtr! She raved to me not only about it’s many health benefits, but also about how it made her body feel better as a whole. As a teacher who is busy all day, standing on her feet, she found she no longer needed an afternoon cup of coffee; MudWtr sustained her all day long!

I recognized pretty early on in life, that coffee gave me major side effects like, jitters, racing heart, and threw off my sleeping pattern in a major way! For that reason, I’ve primarily stuck with tea as my go-to energy booster. After hearing about MudWtr multiple times, I decided to try it out for myself. Not only do I enjoy the taste and how it positively effects my body, but I also like that it has the mushroom complex inside it. Sam and I used to take an additional mushroom complex before working out, as it helped give us that extra boost of energy we needed to bring our workouts to another level, (especially for those long runs or healthy lifting sessions.) Now we no longer need to take that supplement because everything is located in MudWtr, which not only saves us money but reduces the amount of vitamins we have to swallow on a daily basis! That’s a total win!


Who Drinks It?!

Athletes especially love this drink because most of the ingredients contain anti-inflammatory properties which aid in faster muscle recovery, and reduced soreness.

Also, those with arthritis and osteoarthritis enjoy the benefits of this mixture because it lessens their pain and they discovered they could reduce their pain medication.

Student’s studying for finals or writing long dissertations enjoy the brain boosting, natural energy that MudWtr gives them when they need it most.

Cancer patient’s enjoy drinking MudWtr not only because it’s mushroom complex contains many cancer fighting agents, but because it lessens their nausea, boosts their immunity, and keeps their bodies clean with all it’s anti-oxidant properties..

Those suffering with depression and anxiety drink MudWtr to help them balance their mood, lessen stress, and receive overall vitality.

You! This drink is for anyone and everyone who want natural, good for you energy!


The Ingredients

  • Masala Chai- a tasty blend of: black tea, ginger, cardamom, nutmeg, black pepper, cinnamon, and cloves. Ginger aids in digestion, anti-inflammatory and anti-oxidant effects. Cloves are also high in anti-oxidants, kills unwanted bacteria in the body, and fights against cancer.

  • Cacao- contains more calcium than cow’s milk, is full of magnesium and anti-oxidants, helps balance blood pressure and overall heart health, and helps to combat depression by increasing one’s mood, and alertness.

  • Lion’s Mane- is a beneficial mushroom which aids in a number of things in the body such as: improving feelings of depression and anxiety, protects against dementia by improving mental clarity, protects against stomach ulcers, reduces heart disease risk etc.

  • Chaga- is also a mushroom which is on the superfood list. It has a variety of vitamins and minerals, but is widely known for it’s anti-aging properties, preventing and fighting cancer, lowering cholesterol, boosting the immune system, lowering inflammation etc.

  • Reishi- is part of the mushroom complex that aids in improving sleep, decreases stress and fatigue, and boosts immunity.

  • Cordyceps- is a mushroom that not only helps treat respiratory issues, but increases endurance and oxygen uptake.

  • Turmeric- which contains curcumin is known widely for it’s anti-inflammatory properties but also aids in weight loss, lowers risk of brain and heart disease, helps to prevent and treat cancer, treats those with alzheimer’s, and reduces symptoms of depression.

  • Cinnamon- not only adds tasty flavoring but is also an anti-inflammatory, anti-microbial, anti-diabetic, and full of anti-oxidants.

  • Himalayan Salt- not only hydrates your body but helps flush out unwanted toxins, regulates blood sugar and hormonal balances, and improves digestion. It gives your body essential minerals as well.

Now it’s your turn, have you tried MudWtr? If so, drop me a line below telling me why you enjoy drinking MudWtr OR click here to buy the MudWtr Starter Kit which includes: a canister of MUD, a rechargeable USB frother, and some creamer samples!

Women Owned

Hi my name is Mari and on top of being an actor, I have a small business called, Mari’s Pallets.

Mari's Pallet Decorative Board Business

I take wood pallets and turn them into decorative signs for your home decor! I started the business, modeled after in-person paint and sip themed parties,

but find that I am commissioned mostly to create boards for individual’s houses and personal businesses.

With Juneteenth and Father’s Day approaching, as well as myblackreceipt.com, I wanted to announce that I have moved my online marketplace from Etsy over to my personal website!

I am excited to continue creating custom boards for your home, business, or special occasion (birthdays, weddings etc)!

One of my favorite things about creating boards is that the sky is really the limit on how creative one can get when customizing their board! For example, I just created a board using my late Grandmother’s handwriting from an old card she wrote me years ago to always commemorate her life and light. I look at it displayed on my wall everyday and it reminds me of her love!

While I do have boards that have inspirational sayings written on them, I really enjoy working with my clients to create custom board’s like the one I made for my Grandmother. They are the true heartbeat of my business.

Thank you for supporting my small business! I truly appreciate all of you and hope to work with you in the future!

xoxo,

Mari


The Benefits of Aromatherapy

Who doesn’t love a good smelling house!? As humans we definitely produce odors. It’s not intentional it just happens. So how can we naturally deodorize our living spaces without spraying harmful chemicals?

Read on!

Disclaimer – this post contains affiliate links to the products that I use and trust. This means I may receive a small commission (at no extra cost to you) if you make a purchase using any of my links below. Thank you for the support!

Disclaimer – this post contains affiliate links to the products that I use and trust. This means I may receive a small commission (at no extra cost to you) if you make a purchase using any of my links below. Thank you for the support!

I never actually thought about just how harmful air neutralizing sprays like: Febreze and Glade plug-ins were until I met my current partner. Sam has asthma which can definitely be exacerbated by strong smells from candles, plug-ins, and various room sprays. So when we moved in together, I had to think about natural ways that we could keep our living space smelling good without compromising our lung health.

Many people suffer migraine or asthma induced episodes due to strong chemical smells. In fact, some chemicals in perfume have been found to be unsafe for our bodies when used topically and also offend others with the strong odor they emit. I specifically remember my middle school choir teacher wouldn't allow students to wear perfume because it caused her to get a headache for many hours.

I was actually introduced to a natural yet effective way to deodorize when I was riding in the back of a ride share one day and smelled something really good! I asked the driver what he used to get the car smelling so fresh, and he said a diffuser. I had never seen one of these before and his was so undetectable. Basically you fill the diffuser machine with water (preferably purified) and add a few drops of an essential oil of your choice. After that, you plug it in and it disperses the natural and safe smells into your space. The ride share driver had a diffuser which was small enough to be powered by a USB port in his car! Since that day I have purchased one for each of my rooms and have discovered that they come in a variety of sizes, shapes, and colors.

Since Sam and I have started practicing daily meditation, we also found that the aromatherapy that the diffusers produce helped to reduce anxiety and provide a relaxing atmosphere in our living spaces. We also like to have them on when we are working out, even after an intense work out session, the room always smells fresh. Not to mention having a small one in the bathroom for all those odors! I have the one that has a night light in bathroom for those late night trips to the loo, so we can avoid turning on bright lights in the middle of the night! Before bed we set the diffuser on a timer, so it automatically shuts off which saves energy and turns back on in the morning so we are greeted by a nice smelling room first thing in the morning!

I would definitely recommend purchasing high quality, pure oils which specifically state whether they are safe for consumption, as these will ensure that you aren’t harming your air quality in your living space. Many oils are toxic, so please make sure you do your homework on which brands to buy. They can be pricey but last a long time as you only need one or two drops per use. I specifically like: Young Living and you can save money by buying the variety pack verses single bottles.

Without delving in too deep on this topic (because there are so many oils), did you know that essential oils have been used for centuries and each one can aid in various things?

Lemon Verbena is not only our very favorite because of it’s fresh, citrus smell, but its also loaded with antioxidants, boosts energy, and helps combat nausea.

Lavender can be used to aid in relaxation and sleep but can also be applied topically (mix a couple drops with a carrier oil like coconut or almond) to reduce headaches and itchy bug bites.

Roman Chamomile has a calming effect for the body and can also ease eczema.

Rose oil can be used topically to clear skin and acne, as well as calm the mind.

Peppermint on top of smelling good, it can help upset stomachs, ease sore muscles, and provide sunburn relief.

I think my favorite thing about diffusers, are that the odor of the aromatherapy does not make the air too strong, which is a major plus- especially for those with asthma. I do know that diffusers are not the only natural method of deodorizing. Tell me how you naturally, and safely make your living space smell good. Comment below.

Xoxo,

Mari

Vegan Taco Recipe

Are you craving taco night but you are vegan (plant based)? Or want to incorporate more meatless meals into your weekly rotation?? What to do?!

Follow this super simple (and inexpensive) recipe on a classic dish!

Disclaimer – this post contains affiliate links to the products that I use and trust. This means I may receive a small commission (at no extra cost to you) if you make a purchase using any of my links below. Thank you for the support!

Disclaimer – this post contains affiliate links to the products that I use and trust. This means I may receive a small commission (at no extra cost to you) if you make a purchase using any of my links below. Thank you for the support!

While tacos have been traditionally made with ground beef/chicken, hard shell tortillas, and cheese- I’ve made some small adjustments for the best flavor. My recipe calls for all plant based ingredients (hello lettuce wraps!) But you can substitute ingredients of your choice! It's one of our favorite dishes and I think you're really going to like it!

Growing up I used to enjoy assisting my Dad with preparing enchiladas (which was always a favorite dish in the Hill household) but oddly enough we didn’t have taco night often.

Now as an adult, taco night happens at least once a week. So what is so great about these tacos anyways?!?

We love them for a number of reasons

  1. Fast to assemble

  2. nutritiously filling foods

  3. Extremely low calorie meal

  4. Tasty flavors

  5. inexpensive

  6. Never gets boring because you can tailor the ingredients based on your tastes

  7. Cleanses out body of excess waste

vegan-tacos-foodporn-nosh-delish-yum-organic

prep time: 8 minutes Servings: 3-4 Calories: 155

Ingredients

  1. One Head of Romaine Lettuce

  2. One bell pepper

  3. one medium onion

  4. One can of black beans

  5. One ripe avocado

  6. bushel of fresh cilantro

  7. fresh salsa

  8. grape tomatoes


Instructions

  1. Tear each romaine leaf off of stock and wash thoroughly using produce wash

  2. Sautée chopped bell pepper and onion over medium/high heat. Season with your favorite spices (cayenne pepper, chili peppers, pepper, salt etc)

  3. Open and rinse can of black beans

  4. Take one or two lettuce leaves and create the taco “boat" on your plate

  5. Fill the “boat" with the heaviest ingredients first. beans (lentils, sweet potatoes, brown rice) then peppers and onions mix, avocado etc

Click here to…..

Learn how to make your own organic produce wash to rid your food of wax and dirt!


Optional substitutes

  • One medium sweet potato diced and baked

  • Lentils

  • Pickled jalapeños

  • Homemade hummus

  • Brown rice

  • Tabouli

  • Fire roasted corn

  • Siete brand Wraps (cashew, cassava, almond)

Instead of using a wheat, corn, or flour tortilla, I use romaine lettuce leaves as the wrap. I like to sautée red bell peppers, and onions together using various spices, and add any type of beans or lentils for the filling. Sometimes I also warm up refried beans and add a plant based cheese of choice.

As a garnish, I top the veggie tacos with slices of fresh avocado, cilantro, fresh salsa, and grape tomatoes.

Full meal for $8

I also like to challenge myself with creating meals made up of all organic ingredients for less than five to ten dollars and this meal certainly fits that criteria! Remember to make a list before heading to the grocery store! I find I can always save more money when I plan out my meals and necessary ingredients before shopping. (Remember To Use Reusable Shopping Bags Whenever You Shop. A Lot Of Stores (Like Whole Foods) Give You Money Back For Using Your Own Bags. If You Click On My Ibotta Link)

Organic head of lettuce: $2.99

One can of organic black beans: $1.09

Organic onion: $0.80

Organic Bell pepper: $0.99

Jar of organic salsa: $2.99

Total: $8.86 score!

This meal is also amazing because it is very filling. You won’t go to bed hungry that’s for sure! And you'll have plenty of leftovers for lunch the following day!

food-organic-ingredients-tacos

Side note: You could even lose extra weight by eating this meal. Thats because this meal is extremely fibrous! So be mentally prepared to go #2 the following day. But look at it this way- who doesn’t love losing extra weight due to excess waste?!

You can swap out or intermingle ingredients each time you make these tacos based on what mood you're in. I especially enjoy making my tacos super spicy one week, to sweet and salty the next week. Its like a choose your own adventure!

perfectfood-foodie-foodphotography-foodblogger

Let me know how you like to prepare your tacos!

Xoxo,

Mari

Learn How to Meditate

I remember getting my first job right after graduating from grad school. I was ecstatic about starting my first full time job as a first grade teacher! After years of hard work and many hours of teacher observations, I felt prepared to have a class of my own. I fully executed all that I had learned from my teachers and mentors and all-in-all, my first couple years as an early childhood educator went well. That is, except for the high levels of stress, which manifested into panic attacks. Nothing prepared me for dealing with all that went into being out on my own for the first time ever, and holding down a full time job. I thought being a full time student was stressful- boy was I wrong!

No matter what circumstances you may find yourself in whether it be- stress from job hunting, caring for an elderly family member, paying bills, pressure at work, loss of job from COVID-19 etc. Stress is NOT healthy for your mind or your body. It raises your levels of a hormone called, Cortisol triggering a “fight or flight” reaction. While stress every now and then is normal, it should not happen constantly. It’s when you put your body under stress all the time that problems can arise. That’s because Cortisol and your adrenal gland control vital things like: your heart rate, blood pressure, digestive tract, and glucose levels in your blood (which directly impact your weight. When your body is constantly “fighting” it can negatively effect your overall health.

I’d never had a panic attack before my teaching days, but after doing some research I found out that I wasn’t alone. Many people deal with panic attacks. While there are various ways of dealing with stress and panic attacks, the method in which I found helped me the most was deep breathing. It’s not only free, but it works immediately!

As I started researching and employing deep breathing exercises more often, I found that the practice of meditation starts with focusing internally on your breathe. I no longer have panic attacks, but in stressful times, I still use deep breathing practices to help me through. I’d like to share how to properly do this with you!

Step 1

Find a quiet place preferably with a seat where you can be alone. Sit up, with your spine straight. You can either fold your legs neatly underneath you, or sit up in a chair with both your legs placed firmly on the floor. If you can’t be alone or somewhere quiet that’s ok too. When I am in a crowded bus or train, I simply pop in my earbuds, and listen to some white noise or calming instrumentals to set the mood.

Step 2

Close your eyes and go to your safe or “happy place”. I call it my happy place from the Adam Sandler movie, Happy Gilmore where Happy’s golf teacher instructs him to improve his golf performance by relaxing and envisioning himself in his safe space where he is the happiest. When you close your eyes, while taking that first deep breathe, move your current thoughts to your happy space where you love to go to relax. (If you don’t want to close your eyes then simply stare down your nose and relax your eye sockets)

Step 3

Breathe in through your nose steadily and count slowly to four. Place a hand on your stomach and make sure to send that air down to fill your belly and not in your shoulders. How does it feel to feel your lungs filling with air?

20200505_115631.jpg

Step 4

Hold your deep breathe in for 4 counts. I like to have one hand on my heart, and one on my stomach, as it has a calming effect.

Step 5

Release your breathe slowly out of your mouth while counting to 8. How does it feel to have the air slowly draining from your body? Continue this cycle until you feel your panic attack and stress melting away from your mind and body.

To Review

The cycle should look like this. “Breathe in, two, three, four, Hold, two, three, four, Release, two, three, four, five, six, seven, Eight.” If your thoughts wander, as they often do, move them back to your breathe. As you start to relax you will find that your body may go limp and you may start to slouch. That’s perfectly alright, just bring your back and spine back into alignment.

When I first started meditating it wasn’t easy to maintain my focus for long periods of time, but it helped me get over my stress quickly. I had to keep practicing in order get better at mediating.

Practice Often

You don’t need to be stressed out to practice meditating. Set yourself a timer. Start with 2 minutes of deep breathing practice. Then 5, 10, 15 minutes and so on. I have found in my own meditation practice that the more often I do it, the easier it becomes to silence my thoughts and become centered within myrself. Also, you can do it literally anywhere! In the car, sitting outside, on the bus etc.

Remember you are resilient. You are strong. Go easy on yourself. By working on your meditation skills you will be improving your overall health and stress management.

20200505_121110_0000.png

Drop me a line below and tell me how meditation has improved your life.

x0x0,

Mari


3 Ways to Make Your Lips Silky Smooth and Soft

Winter months are upon us and cold weather can bring dry skin. I know that for me personally, I find it annoying when my lips are chapped and cracked. When you are constantly on the move it can be hard to remember to pack lip balm, that’s why I have three helpful things you can do to make your lips silky smooth and kiss-ably soft all the time!

Drink more water 

photo-1521141941147-fcac14bec0ee.jpeg

This may sound like a no brainer but surprisingly many do not attribute dry skin with dehydration. One of the main reasons our lips get chapped and dry are due to our low water intake. The more you hydrate your body, you'll find your lips more soft and supple. It also has many other benefits for your skin and body which can be read here:

Moisturize

cold-pressed-unrefined-shea-butter-fat-extracted-nut-seed.jpg

 I've found that adding vaseline, coconut oil, or milking jelly to my lips before bed leaves them unbelievably soft, especially when I wake up first thing in the morning. Apply a moisturizer at night- especially a thick one can really last throughout the entire following day.

*Special note*

Want more overall hydration for your face? Here it is!

<————————

Make Your Own Lip Exfoliator

20200208_192803.jpg

 I would recommend exfoliating your lips once a week. I like to make my own using equal parts coconut oil and sugar. Mix the two ingredients together until its a consistency you like. You can also use Crystallized honey as your lip scrub.

Now it’s your turn- Let me know which one works best for you!

xoxo,

Mari

20200208_200100.png

How to Stay Healthier This Winter

With the news of scary health epidemics like, Coronavirus it’s important now more than ever to arm ourselves with the proper supplements to keep our bodies healthy. Here’s a list of items that I utilize everyday if not multiple times a day. They have helped me stay healthy especially while traveling on germy places like NYC subways, buses, planes etc. I hope you will find them useful in protecting your health this winter!

Disclaimer – this post contains affiliate links to the products that I use and trust. This means I may receive a small commission (at no extra cost to you) if you make a purchase using any of my links below. Thank you for the support!

Disclaimer – this post contains affiliate links to the products that I use and trust. This means I may receive a small commission (at no extra cost to you) if you make a purchase using any of my links below. Thank you for the support!

Vitamin C with Rosehips

Vitamin C is something that I take multiple times a day. It has so many benefits. It’s a powerful antioxidant that boosts immunity by helping your white blood cells work optimally. It helps to battle high blood pressure, reduce heart disease risk, protects against gout attacks, improves iron absorption, and reduces dementia risk. Vitamin C is water soluble so you don’t have to worry about taking too much of it because anything unused will get flushed out of your body with water.

Echinacea Goldenseal

I only take this supplement when I’m feeling run down as using it too often will lose its healing potency. It works so well because the Echinacea and Goldenseal work together fight infections within the body. Goldenseal has antimicrobial properties that help to regulate mucus production, aid with diarrhea and upset stomach, and is a natural diuretic meaning it will get rid of excess water weight within the body.

Some stores even sell just the powder from the root of the Goldenseal to sprinkle in open cuts for faster healing, and a few cosmetic company’s put it in makeup and lotions to reduce acne.

Apple Cider Vinegar

I personally drink a cup of warm water with a tablespoon of ACV on an empty stomach first thing every morning to help “get things moving”. It works like magic every time but there are so many benefits of ACV both internally and externally. I like to use it in my hair and face masks weekly but its great at warding off sickness because it kills many types of harmful bacteria, lowers blood sugar and diabetes, helps you lose weight and belly fat, and lowers cholesterol and improves heart health to name a few.

What To Do When Cold/Flu Symptoms Arise

20200208_200438.jpg

As soon as your body starts giving you cues that it may becoming run down, follow these steps:

  • Immediately take one tablespoon of Apple Cider Vinegar mixed with a glass water. The ACV works to alkalinize your body to help kill unwanted bacteria and viruses in your body. If you can’t bear the taste or smell of ACV, then I’d recommend mixing a tablespoon in with your favorite tea with honey.

  • Take your multivitamin, another dose of Echinacea Goldenseal, Elderberry syrup, and at least 1000mg of Vitamin C. Make sure to drink a lot of water to flush out all the bad toxins which are making you sick out of your body. I personally find that drinking warm water is better than drinking ice cold water. Again, Vitamin C is water soluble so don’t worry about taking too much of it because anything unused will get flushed out of your body with the water.

  • Rest is best! Extra sleep coupled with the supplements above can knock out any sickness in your body when done quickly. Extra shut eye can help to boost the immune system. I’ve felt badly before, went to bed super early, followed the steps above and woke up the next day feeling no symptoms whatsoever.

What methods do you employ during the winter months to ward of sickness? Comment below to share!

xoxo,

Mari

stay-healthier-during-the-winter

Six Ways to save money AND reduce to help save the planet

With topics like global warming frequently in the news, I wanted to find ways to reduce my carbon footprint while living within my budget. Below you will find six ways that have worked for me and my family.

Disclaimer – this post contains affiliate links to the products that I use and trust. This means I may receive a small commission (at no extra cost to you) if you make a purchase using any of my links below. Thank you for the support!

Disclaimer – this post contains affiliate links to the products that I use and trust. This means I may receive a small commission (at no extra cost to you) if you make a purchase using any of my links below. Thank you for the support!

Got slightly used clothes, shoes, or brand new items with the price tag still on it? Retail therapy  is a real thing and we live in a day and age where social media is constantly pushing new things to buy at us. We fall into their marketing trap and before long we have WAY more things than we really need. There's a statistic that says people wear only 20% of the clothes their closet. #shocking! If that sounds like you then, use the Poshmark app to sell those extra items before that collect dust. Plus buying used clothes is part of a more sustainable circular fashion lifestyle!

It's time to start Marie Kondo-ing your closet and selling the clothes you don't ever wear on the app called, Poshmark. It's easy to use- simply snap a couple pictures of your clothes or accessories, write a couple sentences describing the item, name a price and you're done! Once you sell an item the app even creates the shipping label for you. I use the money I make from Ibotta to buy things on Poshmark! #Winning <—Click on this link and I’ll follow you back and repost your clothes!

-Ibotta-

There are sooo many cash back app’s on the market right now available for consumers to use. I personally like Ibotta the most because it has all the grocery stores I shop at (since that’s where I’ve found I shop the most.)

Save money while shopping at the store on everyday items using this cashback app. Simply select the store you're shopping at, tap the items you'll  be buying (super quick step) and after you're done take a picture of your receipt and viola- cash back! I've gotten about $5 back with each trip and over time it accumulates. I like it because I have linked it to my Venmo And Paypal accounts and used the cashback I earned towards buying other things. #SuperConvenient

Remember to use reusable shopping bags whenever you shop. A lot of stores (like Whole Foods) give you money back for using your own bags. if you click on my Ibotta link <—-we can friend each other and have a friendly competition to see who saves the most each month!

-Diva Cup-

Ladies only on this one: save money by ditching tampons or pads. Yes, I said it- you no longer need to buy sanitary products for your cycle (talk about reducing your footprint and waste!). by using this reusable menstrual cup you’ll save about $120 a year! The average woman spends about $10 on tampons and pads per month plus has to worry about having enough space in her apartment/home/purse/bag etc. to fit the boxes in. Stop taking up drawer space, and save money by making the switch. It does take a little bit of practice but wow!! is it practical and less maintenance than that of disposable sanitary products. AND you’ll spend between 20-33 cents per month by switching to this Reusable cups.

 I've always struggled with heavy and painful periods and this has been a godsend! I wish I'd started years sooner. Not only do I have less pain (only one day) throughout my cycle but I don't have to bother changing my tampons or pads several times a day as the diva cup can last 8-12 hours! They sell the cups literally everywhere but you can also buy it here.

-Loop-

Follow the milkman's model and have all your household cleaning products and dry food delivered to you in the company's reusable containers.  Once your done simply leave outside for the company to pick up. Less waste sitting around your house collecting dust,  leaving you with a piece of mind you helped do your part. And there are no monthly costs or subscription fees!

A Fairly new company formed by the coalition of major manufacturers of consumer packaged goods and foods created Loop, with the hopes of helping save our planet by making a zero-waste supply chain for their products with consumers who’d opt in for the service. They worked with the company, TerraCycle to develop an updated version of the plan.

The idea is that people would get refillable containers and as they use up the items, they can call a Loop pick up driver to take their containers away to be refilled or send them off at a UPS store. Now how cool and easy is that!? by using Loop, you can do your part to lower carbon emissions coming from the process and have a greater impact on reuse.

-Cloth diapers-

Did you know that one of the most common items that take up the most space in landfills are used diapers? That statistic is not only mind-blowing but startling, as diapers take about 500 years to decompose. As the population continues to grow, I urge people with babies to start thinking about making the switch to cloth diapers.

We live in a day and age were there are diaper services in just about every state! They make it super easy for parents by delivering the freshly washed Organic cotton cloth diapers right to your doorstep and hauling away the used diapers. They even provide the used diaper bin and diaper covers. The services prices are actually cheaper ($0.28 cents a month) than buying plastic diapers ($0.48 cents a month). It’s a win-win to save the earth and money at the same time! (you can also buy your own set if you dont want to use a diaper service)

After seeing my little brother grow up using cloth diapers and reading a bunch of articles about the benefits of cloth diapers, children who use cloth diapers potty train about 25% faster than others because they can feel when the cotton diapers are wet thereby training them to use the toilet faster.

-Turo-

Emissions and air pollution are on the rise. We can do our part by taking public transportation or car sharing. If you live near a city than it can be easier to find people to carpool with on a regular basis, but what about those who do not or perhaps are traveling for work?

Renting a vehicle on Turo is not only cost effective because its cheaper (25% less $$) than renting a car through a big rental agency; and it is a perfect residual side income for many people who telecommute or those who work from home and own a vehicle but barely drive who’d like to rent out there vehicle.

  The Turo app is like Airbnb for your car. Simply take some photos of your car, a full description of the vehicle, and the daily renting price of your choice and people without cars can rent your car for the day or week. The company will also add insurance on your vehicle. You'll make money off of it and also help cut down on pollution by sharing your vehicle. One couple I know makes so much money renting out their truck they were able to not only pay off some bills but also afford to buy a Tesla!


So, now it’s your turn to tell me which ways you are going to save the planet and save money. Please share other methods in which I didn’t mention as well.

xo,

Mari

Everything You Need To Know When Going Plant Based!

Are you thinking of going plant based but unsure of what it exactly entails? Here’s what you need to know before making the 100% switch to plant based eating, I PROMISE that the good outweighs the bad….BUT, before you do anything check with your doctor or dietitian for the green light.   

Disclaimer – this post contains affiliate links to the products that I use and trust. This means I may receive a small commission (at no extra cost to you) if you make a purchase using any of my links below. Thank you for the support!

Disclaimer – this post contains affiliate links to the products that I use and trust. This means I may receive a small commission (at no extra cost to you) if you make a purchase using any of my links below. Thank you for the support!

What is Plant Based? Eating a plant based diet means eating fresh, organic produce, fruits, and complex carbs. It means completely eliminating all meat, fish, dairy, and processed foods from your diet. It’s getting as close to nature as humanly possible and becoming overall healthier in the process. My partner and I decided to go this route due to all the toxic hormones that are now being found in meat, fish, and dairy. We’ve lost a combined total of over 100 pounds!

The plant based lifestyle may be challenging at first, so I recommend starting off with a couple plant based meals each week, than a couple complete days, than transitioning to a week. You can also start off slowly by eliminating food groups one at time until you’ve reached one hundred percent plant based status.

Added bonus: buying food for a plant based diet is actually cheaper than buying meat and dairy- saving you $$$$ on your grocery bill! And if you want to save even more money on your grocery bill you can download this app that gives you cash back on your grocery receipts!

Double bonus: cooking meals for the plant based lifestyle is way faster than preparing meals that include meat or fish, thereby decreasing your kitchen time!

Pros of switching

*appropriate BMI for your body

* lower blood pressure

* healthy cholesterol levels

*skin issues disappear- psoriasis, eczema, acne

*fewer colds, flu, allergies

*reduces headaches, bloating

* better digestion

* restful sleep

*increased sexual drive and

 *decreased heart issues

Sample Meal Plan

Breakfast: Oatmeal, a tablespoon of chia seeds, and 1/4 cup of organic blueberries

Snack: “Ants on a log” celery topped with nut butter and raisins

Lunch: Two cups of organic spinach, one cup of chick peas or beans, salsa, slices of bell peppers and any other vegetables you like (chopped celery, carrots, cucumber etc)

Snack: a piece of fruit, and 1/4 cup of nuts

Dinner: 1/2 cup to one cup of quinoa or brown rice, sauteed veggie stirfry, with a curry or peanut sauce, topped with 1/4 of avocado, cilantro


    So why wouldn’t you want to switch?! Here's what you need to know before you go all in:

(these will only last 1-2 weeks before your body starts to GLOW)

edited.jpg

*you will experience gas and bloating but it will only last no more than 1-2 weeks


*some people experience headaches as all the sugary foods exit your body


*Fatigue- I experienced fatigue within the first three days which surprised me because I thought my diet was already pretty clean but boy was I wrong. It wasn’t anything serious, I just went to bed earlier than my normal bedtime. After those three days, I actually had more energy and was able to last the entire day without caffeine or napping (although I do miss my naps…)


*Eating plant based foods are chocked full of fiber soooo you will go to the bathroom like CRAZY but don’t be alarmed. If anything, be happy that your body is naturally cleansing itself by ridding unnecessary waste. I’ve read testimonials that some people lose up to 10 lbs of waste within the first week!


*Your skin is the BIGGEST organ in your body, therefore this detox may wreck havoc on your skin as it flushes out all the toxins caused by eating meat and dairy. I’ve had friends experience acne or excessive sweating. Not to worry that your skin will eventually clear up and begin to glow! (I’m not kidding!)


*Depending on the amount of food your body is used to eating you may feel hungrier during these first few weeks. I was worried about this going in to this lifestyle, but I actually found that I was never hungry because fruits and veggies not only kept me full longer but they also are low caloric foods, so I needed to eat more of them in order to hit my daily caloric intake. (Win-win!)


           Some ways to Help Ease these temporary symptoms

*Help your body go through this natural cleansing process by flushing it out with water. I really enjoy starting out my morning routine by drinking warm lemon water.

*The various poses in yoga help stretch your body and release tense muscles and bloating. Yes, you may pass gas but it'll feel good I promise!

edited.jpg

* Sleep does the body good, so make sure your getting enough shut eye. Resting your body aides in cell repair, muscle rejuvenation and whether it be naps or setting an earlier bedtime, you'll definitely wake up feeling better than the previous day.

edited.jpg

*Keep healthy fats (avocados and nuts) readily available during the transition. I am a huge cheese addict but didn’t realize it until I switched. Healthy fats (as well as nutritional yeast which tastes like cheese) will help you in times of need. (Trust me)

*I use a calorie counter app to help me track my daily food intake. I am actually eating more food than I was because fruits and veggies contain less calories than that of meat and dairy. Because of this, its easy to not hit your daily caloric intake. The app helps ensure that I am eating enough (1500 calories a day) The app is also useful because it tells me how much protein, fat, complex carbs I’m eating, as well as nutrient intake.

Part of why I love using mine is because its fun to scan bar codes which automatically input all the food’s nutritional content into the app, and they literally have EVERYTHING. So you can eat out and still be able to track your meals. My favorite is LoseIt but I’ve also heard great things about MyFitnessPal.

P.S. You don’t need to track your calories forever, it’s just good to start off with to ensure that you are eating enough. Once you’ve gotten the hang of the perfect amount of food for your body you can stop. I find it fun!

* Set aside time to meal prep. I like getting plant based recipe inspiration from Pinterest, as well as Marco Borges (he also guided Jay and Bey when they transitioned to plant based eating) cookbook. Remember: it’s easy to crack open a bag of potato chips and call yourself a vegan. But its highly likely that those "bar code foods" aren’t good for you. Eat them as a once in a while treat. 

* Taking a multivitamin plus B12. A myth in switching to a plant based diet is not getting enough protein. Actually the opposite is true as greens like, spinach and legumes (beans) are packed full of protein. B12 is the only thing that is not readily provided by eating plant based.

*Consider doing intermittent fasting during these first few weeks to help your body complete all its necessary digestive functions in a specific window of time each day. Intermittent fasting means eating all of your meals during a specific window of the day and fasting the rest of the time, around 12-36 hours. For example, eating your first meal at 11am and your last meal by 7pm to allow your body to fast until breakfast the following day. IF aids in weight loss, brain health, reduces chronic health conditions and improves overall health!

*I also suggest using a measuring cup and food scale to measure out your meals to avoid overeating. (These two small but mighty tools helped me lose thirty pounds!)

You should always to listen to your body’s natural cues telling you when its full. Try to avoid distractions (all screens) during mealtimes and focus on eating. (I’ve found that playing smooth instrumental music, lighting a candle, and chatting with my partner helps me focus on my meal, as well as helps wash the days stresses away. This will help you to not over eat!)
         

 Never fear- Replacements Are Here!

We are so lucky that we live in an age where there are more and more food replacements for each diet. Just because you're a plant-based eater doesn't mean that you can't indulge in almond milk ice cream, vegan doughnuts, cream cheese cakes. There’s even a vegan burger that is to die for! Obviously don’t eat these everyday but its always a treat! I will write another post on some of my foodie favs!


Books to read for further education

Go slow. Don’t feel pressured to go cold turkey overnight. Perhaps consider going week by week and cutting out meat and dairy slowly. Keep a food journal (calorie counter app) to see how your body reacts when certain foods are cut out. It’s not always easy, you will be tempted, but I promise once you start to see results you won’t want to stop! My partner and I have lost a combined 100 pounds of weight living the plant based lifestyle! It’s worth it, plus you will increase your life expectancy!

I’m here to help guide you! Drop me a line below letting me know your thoughts on this fantastic lifestyle. I’d love to hear from you!

xoxo,

Mari

3 Ways You Can Enjoy The Spring Season Even More!

Spring is here and boy did she hit with us with all the good things we appreciate the most: more sun, longer days, nicer weather, fresh flowers and the list continues….Spring also brought with her some annoyances as well, like pesky bugs and lots and lots of thick, yellow pollen! I read the other day that this year has been the highest pollen and spore count in this country in years! I don’t know about you but I have never been as effected by spring allergies as I have been this year. BUT there are ways in which we can arm ourselves against mother natures “friends”. Keep reading :)

Disclaimer – this post contains affiliate links to the products that I use and trust. This means I may receive a small commission (at no extra cost to you) if you make a purchase using any of my links below. Thank you for the support!

Disclaimer – this post contains affiliate links to the products that I use and trust. This means I may receive a small commission (at no extra cost to you) if you make a purchase using any of my links below. Thank you for the support!

Raw Local Honey For Allergies

One of the goals of this blog is to try and give you (and myself) some healthy alternatives to over the counter drugs and products. Those products aren’t natural and contain chemicals that we can’t read, let alone know or trust to protect our bodies. When allergies strike, I know it’s so easy to reach for drugs like: Zyrtec or Allegro to ease the symptoms but those only mask them for a short duration. Local, raw honey on the other hand can cure your allergies altogether if you plan ahead.

honey for korean facial.jpg

The honey bees make the honey using the pollen from local plants and flowers. You must eat local honey from the area that you live in because you are essentially digesting all of the pollen and microbes that make the seasonal allergies your body comes in contact with; thereby allowing your body to get used to these enzymes. It is recommended that you eat the honey during the winter months so that your body has enough time to adjust before allergy season fully hits.

DIY Natural Bug Spray

Remember that our skin is the biggest organ in our body and it's really important to be mindful of what you put on your skin. That's why I like to use natural, organic, essential oils to make my own bug spray when I know I will be outdoors! The mixture listed below is my own personal favorite. I know there are a lot of DIY natural bug spray recipes that you can draw upon but these are just my favorite because they smell so good and work well for my skin chemistry. You can play around with different oil mixtures to find the right fit for you. An added bonus is that they also smell so good that you can definitely rock the scent as your perfume!

glass blue spray bottle.jpg

Here’s my mixture:

I mix a few drops of each essential oil with some witch hazel as the base in a small glass darkly tinted spray bottle.

Essential Oils: Citronella, clove, lemongrass, rosemary, tea tree, eucalyptus, lavender, spearmint, peppermint, and cinnamon.

Essential Oil For Bug Bites

As spring arrives so do the bugs. All we want to do is be outside and enjoy the warm weather after being stuck inside during all those cold winter months! Bugs can certainly put a damper on our outdoor plans. These little creatures are so annoying in big part because a lot of people and animals get bitten! But luckily there are some essential oils that can help soothe your bitten up skin.

  •       Lavendar

  •       Eucalyptus

  •       Tea Trea

  •       Peppermint

  •       Rosemary

  •       Thyme

It is recommended that you use a base oil, which is an unscented oil (like almond or coconut oils) and mix it with a couple of drops of any of these essential oils. You can also mix these essential oils as they all have antimicrobial, anti-fungal and inflammatory properties.

Your turn! Drop me a line below letting readers know what you use essential oil for and which ones are your favorites.

Thanks for reading!

xoxo,

Mari

Dear Spring, Please be kind to me

The Ultimate Hydration 10 Step Facial Routine

Let’s be real: there’s no fountain of youth BUT we can do as much as we can to keep our bodies healthy! Our skin is our biggest organ so it’s only right that we nourish and protect it as much as we can.

I've recently realized that the methods and products I was using and the order of the routine, like Oil Cleansing and Double Cleansing, were very similar to the 10 Step Korean Skin Care Routine. I've noticed that like the Korean skin care method, hydration is key! Also, I’ve read other articles from dermatologists that recommend doing your facial care routine to include your face all the way to your shoulders. So if you suffer from skin problems or want a more youthful appearance please read on!

Disclaimer – this post contains affiliate links to the products that I use and trust. This means I may receive a small commission (at no extra cost to you) if you make a purchase using any of my links below. Thank you for the support!

Disclaimer – this post contains affiliate links to the products that I use and trust. This means I may receive a small commission (at no extra cost to you) if you make a purchase using any of my links below. Thank you for the support!

MORNING ROUTINE


OIL CLEANSE: COCONUT OIL

coconuts-fruit-with-coconut-oil-on-pink-pastel.jpg
  1. Apply a pea sized amount of oil directly to your face. Massage upward and outward.

  2. Leave oil on skin for 15 minutes before rinsing off. Side note: I normally don't spend 15 minutes massaging oil into my face, I just massage until I feel like it's been rubbed in pretty well. When I wake up, I oil cleanse my face quickly, do things around the house before I get into the shower (and viola! There goes the 15 minutes lol)

And if something doesn't work for you! It's okay! Switch it up! Brown Rice Syrup instead of Honey or Jojoba Oil instead of Coconut Oil. Anything that works best for you. I know people say that Coconut Oil and Olive Oil clogs pores, so if that is the case find another oil that is compatible with your skin.

I use any type of castor oil! Organic Black Jamaican/Haitian Castor Oil is high quality. I just try to make sure that all of my ingredients are organic, raw, unrefined, etc. And if all you have is Coconut Oil, that's great too! I just recently switched over to Castor Oil and Olive Oil. 

honey for korean facial.jpg


DOUBLE CLEANSE: HONEY

  1. This step will take off the rest of the oil. Apply as much honey to your face and massage it in. Then rinse! I put the honey on in the shower. It’s way less messy that way!

  2. Try to rinse off as much as possible, but don't worry if all the oil doesn't come off! (It never does... lolol)


TONER: Apple Cider Vinegar and Water

spray-bottle-clip-art-illustration.png
  1. Mix 1/2 parts Apple Cider Vinegar (ACV) & 1/2 Drinking Water. I like to use a spray bottle to mix the ingredients.

  2. On a washcloth spray the mix and then wipe your face with it and then rinse (ACV smells a bit).


MOISTURIZE: COCONUT OIL or SHEA BUTTER

cold-pressed-unrefined-shea-butter-fat-extracted-nut-seed.jpg
  1. You can use a mix of your favorite oils! In the warmer months I use oils and in the colder months I mix my oils with Shea Butter .

  2. Warm up the serums and moisturizers in your hands first and then press it onto face. They say pressing is better than rubbing.


HYDRATING MIST: ROSE WATER (optional)

This step helps to seal in the moisture and gives added confidence (because who doesn’t love a good facial head toss hehe)! You can use Rose Water or make your own mix!

<—————— Here’s my fav to use


EVENING ROUTINE

(Pretty much the same as the Morning Routine.)

face mask clip art before and after.png

OIL CLEANSE: CASTOR OIL/OLIVE OIL or COCONUT OIL

  1. Mix together 1/2 parts oil of your choice and 1/2 parts Castor Oil is very cleansing! You can use just Coconut Oil here to cleanse too if you want.


GENTLY EXFOLIATE:

  1. Mix together baking soda and/or freshly used coffee grinds into a powder scrub, with bentonite clay in equal parts using a plastic or wooden bowl and mixing utensil.

  2. If you like your exfoliating scrubs more on the abrasive side, add a little more baking soda or coffee grinds. I've been using baking soda for a couple years now and I've had nothing but good results, but just like Coconut Oil/Olive Oil, there's a lot of mixed feelings on using baking soda. It's what helped heal my acne, so I definitely recommend starting off with it especially if you’re someone who has acne. Even if you don't have acne, you can still use it.

Pro tip: Don’t exfoliate every night, perhaps once or twice a week. If you don’t care for the exfoliators mentioned above, you can use honey instead.

TONER:

  1. Mix apple cider vinegar in equal parts with filtered water.


SERUM: ROSE HIP OIL

Argon Oil or any serum you like! I never knew this, but the serum should be put on before the moisturizer because it's concentrated with antioxidants & nourishment.

I never realized how much my boyfriend and I use essential oils in our daily lives (not just for facials but for things like headaches, back pain, cramps etc) but we were going through it A LOT so I actually bought this bundle package which has been such a money saver!

MOISTURIZE: COCONUT OIL and/or SHEA BUTTER


MIST: ROSE WATER (optional)

WEEKLY/BIWEEKLY/MONTHLY FACIAL

GOAL: Keep your face hydrated! So throughout this facial, if you feel your face getting dry, apply the hydrating mist.

1. OIL CLEANSE: COCONUT OIL

2. MASSAGE: UPWARD & OUTWARD (15 MINS) I love to do this step using a jade roller! My pro tip is to store it in the freezer, as it feels so good to de-puff your face and under eyes before setting off for the day!

marielahill.com.png

3. STEAM: GREEN TEA (10 MINS)

1. Fill up a big pot with about an inch or 2 inches of Drinking Water.

2. Drop in 4 Green Tea bags or 1 cup of dried tea.

3. Cover with a lid & bring to a boil & then cut off the heat.

4. Place the pot on top of a towel, on top of a table that you can comfortably sit over.

5. Remove lid & let the pot cool off for 30 seconds (more or less), until the temperature is hot, but comfortable for you.

6. Put another towel around your neck & start a timer for 10 minutes.

Steam-your-face-to-open-up-your-pores-pot.jpg

7. Put the towel over your head, over the pot of hot water. Make sure no hot air escapes.

8. Try to keep as much heat in as possible, but if it's too hot, let the air out, but go back under!

9. After the 10 minutes, allow your face to cool down for 30 seconds.

4. GENTLY EXFOLIATE: BAKING SODA or COFFEE GRINDS

5. MASK: (20 MINS) Clay & ACV or Activated Charcoal & Honey

6. TONER: ACV/WATER

7. 7 SKIN METHOD: ROSE WATER- The 7 Skin Method is Korean. Apply the hydrating mist 7 times. Don't let your face dry out! After the 7th mist, moisturize You can wait until your skin dries a bit, but not completely.

8. SERUM: ROSE HIP OIL

9. MOISTURIZE: COCONUT OIL/SHEA BUTTER

10. HYDRATING MIST: ROSE WATER

More tips: For my toner I recommend using a wash cloth to distribute on your face (instead of using cotton balls because my partner and I are trying to become as zero waste as possible)! I try to moisturize my face (and all of my skin, for that matter) when it's damp/still wet, it helps to retain more moisture.

I do these routines every day and night. It may seem like a lot, but it starts to become second nature after a few times, I promise! And it takes about 10 minutes or less! I feel a lot better about myself when I do this and I’ve also found that it helps me decompress and unpack my day!

10steproutine.png

Let me know your favorite parts of these facial routines! Drop me a line below please. And of course be a dear and like, and share this with your friends!

heart.jpg

xoxo,

Mari

Healthy On-The-Go Snacks

In America, we love to snack in between meals. Heck, I personally love to snack! so-much-so that I gained an extra 30 lbs snacking (yikes!)....that’s why its super important to be cognizant of what exactly we are putting in our bodies- especially when that snacking craving hits. I have found that packing my food ahead of time (meal planning) has GREATLY helped me lose all that extra weight and keep it off. With my job I’m constantly on the go and these snacks to help me avoid being hungry, and saved me extra money from having to eat out. What a win! Keep reading to find out which snacks I’ve found to be satisfyingly yummy and nutritious!

Disclaimer – this post contains affiliate links to the products that I use and trust. This means I may receive a small commission (at no extra cost to you) if you make a purchase using any of my links below. Thank you for the support!

Disclaimer – this post contains affiliate links to the products that I use and trust. This means I may receive a small commission (at no extra cost to you) if you make a purchase using any of my links below. Thank you for the support!

BUT snacking can also be dangerous for our health for a number of reasons. Let's whip out our calculators and do some basic math shall we?

In order to maintain a healthy weight or loose weight our bodies need to consume a set number of calories a day right? Lets say a woman who is 5'6 needs to eat between 1500-1800 calories a day to maintain a healthy weight. Mindlessly snacking on a bag of chips, cookies, even a slice of pizza can easily add 500-800 calories in one sitting. (This doesn’t even include our main meals or other snacks which would put us over our daily caloric intake leading to extra weight gain.) That’s 2300 calories a day, which is a little over 1.5 lbs of gained weight a week. Oof...do you want to gain weight or lose weight? I know which one I choose!

Reason #2 snacking can be dangerous for our health is because many snacks tend to be full of salt and other additives which are not good for our bodies. Did you know salt is in literally everything we eat?! Alarmingly yes, its in condiments, juices and soft drinks, sports drinks, and especially snack food! That’s why its so important to plan your snacks ahead of time and pack yourself healthy, fulfilling snacks that won't leave you hungry shortly after eating them.

I like to pack the snacks below for a number of reasons because:

- they are quick and easy to pack for the day

- I’m always rushing out of the house late for something....these are easy to reach for in a tight pinch

-they wont explode in my bag or purse (because who wants to eat a smashed banana?), they aren’t a messy snack that will stain my clothes.

- Raw Nuts-

vitchakorn-koonyosying-494184-unsplash.jpg

Raw nuts like: almonds, walnuts, cashews (make sure you buy the unsalted ones!) are a great way to fit omega-3 fatty acids into your diet. Depending on the nut, they are packed with fiber and nutrients such as: ALA’s, Vitamin E, Folate, Selenium and the list goes on!

I like them because each nut has a different taste and texture. They are a good type of sneaky, in that they fill me up without having to eat a lot and I have found that I don’t get as hungry soon after eating them. I like to pair this snack with water or tea.

-Peeled Snacks

Peeled Snacks #healthysnackoptions

Peeled snacks are great for those days when you don’t want to do an food prep but still want to eat healthy delicious snacks on the go. The Peeled Snacks company only makes their dried fruit using organic produce and you can trust that it isn’t going to be filled with lots of additives, sulfites, added sugar or oils. I love snacks that I can trust!

- Dehydrated Veggies-

dehydrated veggies.jpg

I would LOVE to buy a dehydrator to make my own dehydrated fruit and veggies snacks but let’s be real- those machines are not only big- but expensive #nobodygottimeforthat! That’s why I buy mine from stores like Whole Foods and other natural food stores. My favorites are: beet chips, chickpeas, kale chips, and dried figs. I really like dehydrated veggies because they are crispy and give me that crunch to satisfy my chip cravings. They are really tasty and I don’t feel like I’m eating a snack that is good me!

I also love the Terra chip brand! The flavored ones are a bit too salty for my taste, so I tend to stick with the unsalted ones.

-Fresh Fruit-

fresh fruit

I feel like this area is pretty self explanatory. I like to always carry apples, orange, cucumber slices, blueberries, grapes, cherries (make sure to wash your produce before eating these to ensure you wash off pesticides and germs) with me in my purse or bag.

-Popcorn-

popcorn

Two cups of freshly air popped corn has 46 calories. One cup of store bought popcorn has 150 calories…. which one would you choose? Did you know that popping your own and adding a seasoning like: pepper flakes, cayenne, or nutritional yeast on top packs WAY less calories and sodium than a store bought brand?? It literally takes no less than two minutes to pop. I have found it to be a delicious life saver while on the road!

20190508_110045_0000.png

There’s my go-to on-the-go mess free snack list. Now it’s your turn to share you favorite snacks that won’t break your wellness goals! Comment below please.

x0x0,

Mari

5 Ways To Get Rid Of Puffy Eyes

Lets face it, we all get puffy bags underneath our eyes once in a while. It can be caused from a number of things such as, allergies,  too much drinking,  smoking,  lack of sleep,  too much rubbing under the eyes which can break the blood vessels under our skin causing dark circles. How do we get rid of these dark circles for a more refreshed, awake look?

Disclaimer – this post contains affiliate links to the products that I use and trust. This means I may receive a small commission (at no extra cost to you) if you make a purchase using any of my links below. Thank you for the support!

Disclaimer – this post contains affiliate links to the products that I use and trust. This means I may receive a small commission (at no extra cost to you) if you make a purchase using any of my links below. Thank you for the support!

These natural eye remedies work due to the natural enzymes which reduce inflammation and tighten skin for a more flawless look. I recommend using your ring finger to lightly pat the mixture on your eyes. The skin around your eyes is super delicate and more susceptible to wrinkles if you are too rough!


Avocado eye mask

Eating avocados not only helps strengthen your eyes and cataracts due to having lutein which is known to improve eyesight. It also can reduce wrinkles and inflammation if put on topically. Here’s some other beauty enhancements you can do at home from the superfood avocados!

Directions for making avocado mixture:

  1. Wash Your Avocado To Get Rid Of The Wax, And Pesky Pesticides Lingering On The Skin. *You Can Find A Helpful DIY Produce Wash Here!*

  2. Slice Your Avocado In Half. 

  3. Scoop Out The Filling With A Spoon.

  4. Use a Utensil To Whip Into A Thick Paste. 

*(If You Have Food Allergies Or Super Sensitive Skin I'd Recommend Testing A Small Patch Of Skin Before Going All Out)*

avoeyes.jpg

Directions for making eye cream:

  1. Apply the whipped avocado mixture to your eye area. I recommend using your ring finger to lightly pat the mixture on your eyes. The skin around your eyes is super delicate!

  2. Close your eyes. I like to use a warm wash cloth to cover my eyes during this time (plus its super relaxing)

  3. Leave on skin for about 10-15 minutes and rinse off with warm water.

3. Follow up by dabbing a few drops of avocado oil around your eyes with your ring finger. One of my favorite oil brands Now brand because their products are effective and won’t break your bank account!


Tea bag method

After steeping your tea bag in hot water:

  1. apply the hot tea bag directly to your the area right underneath your eyes.

  2. Continue to hold it in place as you sip your tea.

  3. Take a few deep breathes and think about all the things you are grateful for…..feel your stress melt away!

puffy eyes.jpg

Bonus: The caffeine in the tea helps to tighten the skin around the eyes.

                     Wine method

As you sip your red wine:

  1. take a cotton ball and dip a small section into the red wine.

  2. Dab the moistened cotton ball directly to your bags to reduce the swelling.

Resveratrol which is found in wine can help improve broken blood vessels due to its anti-aging properties which are natural anti-oxidants and anti-inflammatory. 

Tip: But don’t drink too much because that can cause dehydration which increases dark circles under the eyes!

                   Coffee grounds 

After brewing your coffee:

  1. take some of the loose grounds and apply them using your ring finger to your under eye area.

  2. let the grounds sit for 5-10 minutes or until dry

  3. Rinse off and pat dry

  4. Follow up with your normal skin care routine

Bonus: The caffeine in the coffee will help to tighten the skin around the eyes.

               Ice Cubes

In a rush to do the methods listed above?

  1. Just wrap an ice cube in a wash cloth or paper towel

  2. apply right to your under eye.


Bonus: This will constrict the blood vessels in your bags, thereby decreasing the swelling! Quick and easy fix!

Now its your turn- let me know how you decrease your under eye swelling?!

5 Ways (1).png

xoxo,

Mari

Save money and your skin with this SUPERFOOD

Ever buy produce like avocados just to have it go bad before you've had a chance to eat it?! How annoying and what a waste of money. 

I've learned to reuse my spoiled items to still benefit my body, and I'm going to show you how! Because why waste money for those over priced skin care creams!?

Disclaimer – this post contains affiliate links to the products that I use and trust. This means I may receive a small commission (at no extra cost to you) if you make a purchase using any of my links below. Thank you for the support!

Disclaimer – this post contains affiliate links to the products that I use and trust. This means I may receive a small commission (at no extra cost to you) if you make a purchase using any of my links below. Thank you for the support!

Directions: 

  1. Wash your avocado to get rid of the wax, and pesky pesticides lingering on the skin.

 *You can find a helpful DIY produce wash here!*

2. Slice your spoiled avocado in half. 

3. Scoop out the filling with a spoon. The avocado meat will be mushy because its gone a little bad. 

4. Use your utensil to whip into a thick paste. 

*(If you have food allergies or super sensitive skin I'd recommend testing a small patch of skin before going all out)*

funny-girl-holding-half-avocado-front-her-face-showing-tongue-photo-smiling-african-american-woman-white-131144763.jpg

   Avocado Hair Mask

Avocado's are a great way to get more Omega 3's. Did you know they also contain more potassium than a banana! They are chocked full of nutrients, oils, and good fats for your body! The oil in avocados can reduce dandruff and cradle cap.

Directions:

Apply whipped avocados directly to your scalp. I like to do this immediately after a workout when my head is super warm because the pores in my scalp and hair shafts are more open which allows the nutrients and oils to penetrate better. 

I then reuse a plastic grocery bag (seran wrap works too!) to wrap my head in.

Leave on for 10-20 minutes.

Wash out with warm water using your sulfate free shampoo.

You can apply avocado oil to your wet hair to seal in the moisture to your hair strands for added hydration!


Avocado Wrinkle Reducer

Eating avocados not only helps strengthen your eyes and cataracts due to having lutein which is known to improve eyesight. It also can reduce wrinkles if put on topically.

Directions:

Apply the whipped avocado mixture to your eye area. I recommend using your ring finger to lightly pat the mixture on your eyes. The skin around your eyes is super delicate!

Close your eyes. I like to use a warm wash cloth to cover my eyes during this time (plus its super relaxing)

Leave on skin for about 10-15 minutes and rinse off with warm water.

Follow up by dabbing a few drops of avocado oil around your eyes with your ring finger.


Avocado Skin Mask

    Not only do they do wonders internally but they can also improve your face and skin! 

    They have Vitamin E which aides in wrinkle prevention, as well as making your skin baby soft. If you have a painful sunburn, this mask will help soothe your burn while repairing the skin cells.

    Avocados also have chloroyphll  which both hydrates and reduces puffiness. 

And if you have psoriasis or eczema, this mask works as an effective treatment to help heal your dry, flaky skin.

   The avocado oil moisturizes your skin leaving it soft without all the greasy after effects. This can help prevent clogged pores, acne, and inflammation due to acne.

avo face mask.jpg

Directions:

Apply the whipped avocado mixture to your entire face and neck. I like to tone my face to ensure the skin is clean.

Leave on skin for about 10-15 minutes and rinse off with warm water.

Follow up with your normal skin care steps.

Hair & Skin care.png

How do avocados fit in to your life?

xx,

Mari

Earth Day Post! How To Ban Plastic from your life and Save Money!

Did you know that literally EVERY piece of plastic you’ve ever touched or used still exists on earth?!! Yup, that fact alone is HORRIFYING…

Disclaimer – this post contains affiliate links to the products that I use and trust. This means I may receive a small commission (at no extra cost to you) if you make a purchase using any of my links below. Thank you for the support!

Disclaimer – this post contains affiliate links to the products that I use and trust. This means I may receive a small commission (at no extra cost to you) if you make a purchase using any of my links below. Thank you for the support!

...but here’s some ways in which you can recycle, reduce, reuse….just like Captain Planet taught us so long ago!

captain%2Bplanet.jpg

Recently a friend asked me what she should give up for Lent. When you give up something for Lent it's usually something that you use everyday that makes your life more convenient. By giving it up, you are essentially trying to feel how it feels to make big sacrifices in your life.

This question really got me thinking about what we as people use everyday that make our lives easier and no sooner was I trying to figure that out, when I heard a podcast on NPR. The special guest was talking about climate changes (The Green New Deal) and specifically the history of NYC's trash and recycling. He went on to describe how in the past New York City used to send all their plastic to China but now China doesn't want it anymore.

 So the United States has a really big problem they have to solve: trying to figure out ways to recycle and reuse our ever growing plastic consumption. Part of the issue is that there are some plastics that can't be recycled. These are called, single-use plastics. Single use plastics include: tops of fountain drink containers, straws, plastic bags that you get at the grocery store, trash bags, electronics packaging, and the list goes on.

So, what can you do about it? There are many different things that you can do to eliminate plastic from your life. Some of these are very extreme and just the thought of doing them myself would prove to be extremely difficult- but I am trying! I challenge you as I challenge myself to try and eliminate using as much plastic as you were before and also a call to action to recycle everything that can be recycled.

               Replace plastic straws

* for cardboard ones (which is becoming very popular to use) The entire time that I was in Florida no matter if I was in Captiva Island or in Miami, every restaurant and store that served us drinks utilized cardboard straws. Starbucks is doing it and so should you!

* you can also buy metal straws at stores like Anthropology and even find them here.

             Reusable Beverage Containers

* the recycle gurus would definitely steer you more towards using glass mason jars or a travel mug for your hot or cold beverages but my opinion is as long as you use a reusable container the choice is yours.

*I like to reuse glass jars from tomato sauces, artichoke hearts, jams etc. Anything that you buy that comes with a lid works!

Reusable Cloth Bags

* these are not only great for carrying all your purchases from the grocery store and mall but also they come in really cute sizes shapes and Designs. I really enjoy using this one because it folds down into a small bag and it's easy to carry everywhere. Because who doesn't make on-the-fly purchases?!

*Invest in some mesh bags (very similar to the mesh bags you use to wash your intimates in) to put your produce in.

           Trash Bags

* this is one area that kind of really grosses me out and I'm not sure that I can replace at this moment. I have read that in order to stop using trash bags you can line all your garbage receptacles with newspapers. It is also recommended that you dump out all liquids before using this method.

               Items For The Baby

* being a parent is a full-time job as it is, which is why you have to take this extra step in reducing plastic. My cousins and friends have babies and every time that I see them literally all the items that the child needs are made of plastic! From the plastic baby bottles to the toys all the way to strollers and baby seats. Everything is made out of plastic! 

So how do you make replacements? Well it's going to be really hard to replace everything that your child needs but some suggestions are:

* using glass baby bottles, reusable dishes and these can be plastic but glass is definitely better. 

*Trying to find toys that are made out of wood because these are actually better for the environment and they cut down on toxic smells that may be harmful to your baby's developing lungs.

* Instead of using foam mats for your child's playroom consider using plush area rugs or plush blankets instead.

Coffee Money Saver

*Instead of buying the coffee pods for your Keurig or instant coffee machines, invest in a reusable coffee pod! You will not only save money buying ground coffee, but you can adjust the strength of your brew by controlling how many grounds you use.

                Food Swaps

* Wrap your sandwiches using washable cloth bags. Beeswax paper also works!

*Refillable beverage containers

*have a set of metal utensils or chopsticks

* glass, Tupperware, and/or thermoses to carry your lunch to work. Studies have actually shown that reheating food in glass container plastic containers is harmful for you because the plastic particles are transmitted to your food when heated. So it's better for your health to use glass containers to eat out of.

Cast Iron Cookware

*Yes, it super easy to cook the perfect omelette, pancake etc using those beautifully crafted non-sticks pots and pans but did you know that they are not only harmful to environment but also to your body?! Overtime the plastic Teflon coating disintegrates into your cooked food. Cast iron pans are made out of iron, which is a vitamin that is actually good for our bodies. Yes, they are a little more frustrating to use because they aren’t as nonstick as the others but what would you rather use? I’ll always opt for the healthier option…

                     Being A Diligent Recycler

* pick up a plastic container that you have right now and flip it over. Do you see the triangle shaped sign in with the arrows? That means that that container can be recycled. Here’s a helpful info-graph guide!           .

                    Sharing is Caring

Did you know that sharing on your social media about how you recycle actually makes other people follow suit and want to recycle as well?! Yes, it's true! People are natural born followers and want to mimic what others do. Copying is the highest form of flattery and in this case you'd be doing yourself as well as improving your environment a great service if you recycle on a weekly basis. Some states like New York even compensate you $0.05 per bottle returned. So recycle and share it on your social media story or your news feed!

Your turn! How do you recycle, reduce, or reuse? Let me know in the comments below!

xx,

Mari

Cut out The Plastic Save the.png

How to whiten your teeth Naturally AND Save Money!

We all want white, sparkling teeth, right!? But using the whitening strips or the fancy ones from the dentist can really strip the enamel that protects our teeth from stains! This can leave them fragile and brittle and susceptible to cracks, cavities, and even more stains. Booooo! Plus who even knows what harsh chemicals are in those whiteners? No one wants those harmful ingredients in their mouths! I know I don’t….So how do we keep our teeth stain free or whiten them if they aren’t the whitest?

Today I’m going to share with you how I whiten my teeth naturally and safely so that you can do it too!

Disclaimer – this post contains affiliate links to the products that I use and trust. This means I may receive a small commission (at no extra cost to you) if you make a purchase using any of my links below. Thank you for the support!

Disclaimer – this post contains affiliate links to the products that I use and trust. This means I may receive a small commission (at no extra cost to you) if you make a purchase using any of my links below. Thank you for the support!

Here are three natural teeth whiteners that you can do at home to help keep your breath fresh and teeth stain free! The ingredients in all three latches on to the grime to wipe away those stains. You can do any of these washes 1-2 times a week!

Turmeric Tooth Wash

Directions:

  1. Wet your toothbrush under running water.

  2. Dip wet brush in turmeric powder, so that it covers the brush. You don’t need much (about 1/8 powder)

  3. Brush your teeth for about two minutes

  4. Then let the turmeric paste sit on your teeth for about 5 minutes. This is the most important step as the turmeric whitens your teeth!

  5. Rinse your mouth with water as normal.

  6. Follow up by brushing your teeth with your regular toothpaste. I recommend using baking soda, as it is a great natural toothpaste.

Charcoal Tooth Wash

Directions:

  1. Mix 1/2 a teaspoon of activated charcoal with 2 tablespoons of coconut oil. If the coconut oil is hard, heat it up to melt before mixing.

  2. Add in 2 tablespoons of baking soda, and perhaps 1-2 drops of an essential oil of your choice.

  3. Brush your teeth for about two minutes

  4. Rinse your mouth with water as normal.

  5. Follow up by brushing your teeth with your regular toothpaste. I recommend using baking soda, as it is a great natural toothpaste.

Coconut Oil Mouth Rinse

Directions:

  1. Measure out 1 tablespoon of coconut oil.

  2. Put in mouth and swish around for 15-20 minutes. Make sure NOT to swallow any oil! The oil may be hard when you first put it in your mouth but don’t worry it will liquefy quickly. I like to oil “pull” while I shower as it makes the time pass by quickly.

  3. When you are done, be sure to spit in the trash as the oil can clog pipes.

  4. Rinse your mouth super well before eating or drinking.

Note: This is by far the hardest method I listed. Twenty minutes is a super long time to do this mouth rinse; its totally ok to work your way up to this. Find a time that works best for you and your schedule. Also, this rinse gathers up bacteria from your mouth and teeth, so it very important to spit it out in the trash, as it can be harmful to your gut if swallowed.

These three tooth whiteners are not only NATURAL but they can save you money and also protect your teeth. The ingredients in these whiteners are safe for your body and you no longer have to spend money constantly buying teeth whitener strips or expensive gels from the dentist!

Which whitening method is your fav?


xo,


Mari

How to clean your produce- the natural way!

We don't know where our produce comes from. Even if they say it's organic it still may have excess dirt, pesticides, fertilizers, and bacteria on the surface. Yuck...yuck...yuck!

I’m going to show you how to thoroughly clean your produce so that you can eat healthy, clean food!

Disclaimer – this post contains affiliate links to the products that I use and trust. This means I may receive a small commission (at no extra cost to you) if you make a purchase using any of my links below. Thank you for the support!

Disclaimer – this post contains affiliate links to the products that I use and trust. This means I may receive a small commission (at no extra cost to you) if you make a purchase using any of my links below. Thank you for the support!

How many apples do you touch in order to find one without bruises? I have to look through at least ten apples in order to find the one I want. I’m touching the produce with my bare hands, and I know I’m not the only one!

On top of that—the people who stock the produce at the grocery store, and the cashiers who handle your fruits and vegetables at checkout even have germs on their fingers (eww) which get transferred to your food! It's VERY important to ensure that our food is properly washed before we consume it. We don't want to get sick! I always make it a practice to wash all my fruits and veggies as soon as I bring them into the house. That way when hunger and snacking strike, I don't have to stop to take time to wash my snacks.

In my wash, I use apple cider vinegar because it helps cut back on the bacteria and pesticides. I use lemon juice because it is a natural antimicrobial property. The apple cider vinegar and the lemon work together to effectively clean my fruits and …

In my wash, I use apple cider vinegar because it helps cut back on the bacteria and pesticides. I use lemon juice because it is a natural antimicrobial property. The apple cider vinegar and the lemon work together to effectively clean my fruits and veggies.

There are two different ways that you can use to clean your produce.

The first way is the spray method. I use this on big fruits and veggies like apples, tomatoes, avocado, bananas.

The second method is the soak method. The soak method works really well with trickier items like broccoli, kale leaves, and grapes. When you soak these things the ingredients are able to get into all the small nooks and crannies ensuring that your produce is thoroughly washed! 

Simply spray, or soak, rinse with cold water, dry, and enjoy!

The proof that this works is in the evidence left behind! This is an organic cilantro bunch that I let soak for ten minutes!

When I took the cilantro out of the produce bag, it appeared to be fresh and clean, but boy do the eyes deceive! Trust me when I say that you’ll feel that much more confident in what you are eating!

Fruit & Veggie Spray

1/2 cup Apple Cider Vinegar

1/2 cup lemon juice

1/2 cup water

Add your ingredients to a clean spray bottle and shake to combine all the ingredients. I recommend using a glass spray bottle because it's better for the environment and the acidity of the solution won't disrupt the glass like it would for plastic. I also like to label my bottles with a little tape and permanent marker so as to not get my spray bottles confused. I store this produce solution in my refrigerator for freshness. It’s good for a month or so. 

I HIGHLY recommend even going as far wipe your cans down. Use cardboard or reusable straws to consume your bevvies! They tend to get dust and germs on them as well!

I HIGHLY recommend even going as far wipe your cans down. Use cardboard or reusable straws to consume your bevvies! They tend to get dust and germs on them as well!

If you aren’t quite sure about making your own produce spray, you can certainly buy a solution. Here’s the one I have used in the past!

If you aren’t quite sure about making your own produce spray, you can certainly buy a solution. Here’s the one I have used in the past!

Let me know what you think and how it goes for you!

xo,

Mari

Top Three Must Have Natural Face Masks

Beauty Starts From the Inside! There are soo many harmful chemicals in our foods, beauty and skin care products, that using natural products made from the earth is literally the only way to maintain a healthy life! That’s why I always recommend making your own masks because-simply put, they are way better for you! I’m going to show you how!

Disclaimer – this post contains affiliate links to the products that I use and trust. This means I may receive a small commission (at no extra cost to you) if you make a purchase using any of my links below. Thank you for the support!

Disclaimer – this post contains affiliate links to the products that I use and trust. This means I may receive a small commission (at no extra cost to you) if you make a purchase using any of my links below. Thank you for the support!

Before doing any of these masks, make sure that you’re face is clean. Download my daily facial routine as a reminder of the key steps….I keep mine handy in my bathroom!

Bentonite Clay Mask

Ingredients:

Bentonite-Clay.jpg

Directions:

Before starting get a glass or plastic bowl and utensil, as the clay will interact with the negative charge of metal which decreases the effectiveness. Mix the two ingredients together until you create a paste. Leave on ten minutes or until the product dries. You may feel a “pulsing” sensation as the mask dries but don’t be alarmed. It works wonders!

This mask really tightens up your face and removes pimples and cystic acne. It’s super drying, so be sure to hydrate your face intensely after this mask.


Turmeric Mask 

Ingredients:

Directions:

Mix all the ingredients together. Apply to a clean face. Leave on ten minutes. Follow up with toner, serum, and moisturizer.

Turmeric is also great for total body uses, such as: digestive aide, as a teeth whitener, prevents and reduces wrinkles, reduces asthma, and is an anti-inflammatory.

Oatmeal mask

Ingredients:

Directions:

Take oatmeal and blend in your food processor. Once you have your oatmeal mixture (it doesn’t have to be a perfect powder) you can add your favorites to this mask such as honey, apple cider vinegar, lemon. Mix ingredients to create a paste. Apply to skin and leave on for 10 mins.

This oatmeal mask helps with acne because it removes impurities from the skin. It also is a very hydrating mask due to its high fat content.

Leave your comments about your favorite mask below!

xx,

Mari